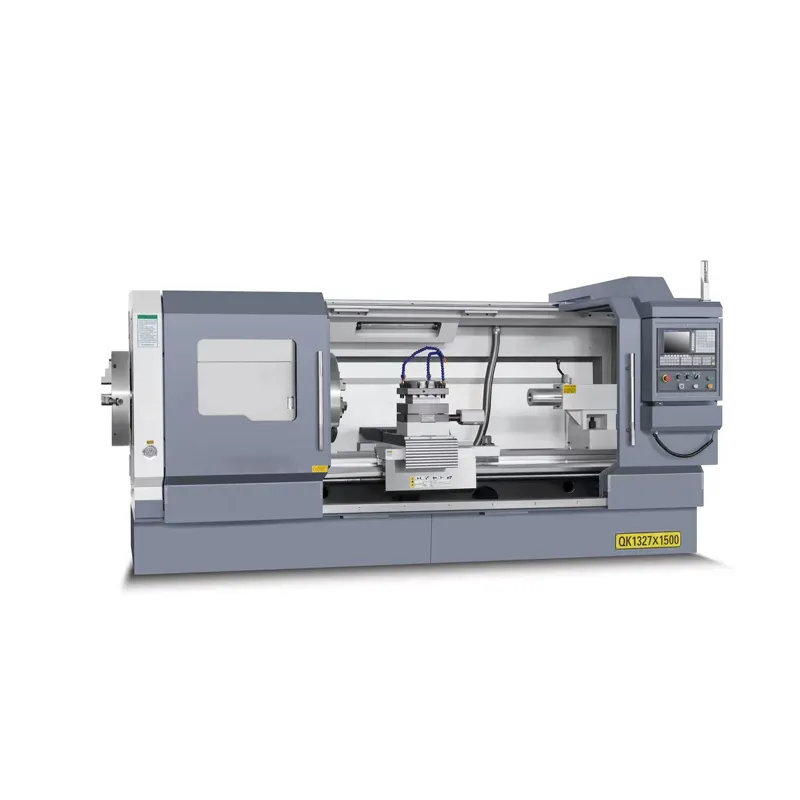
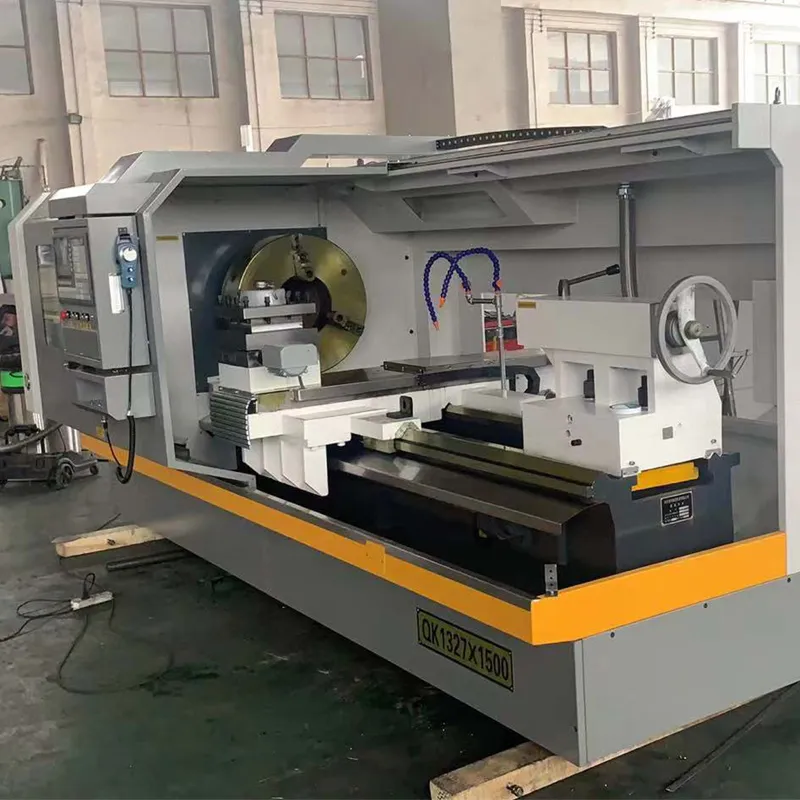
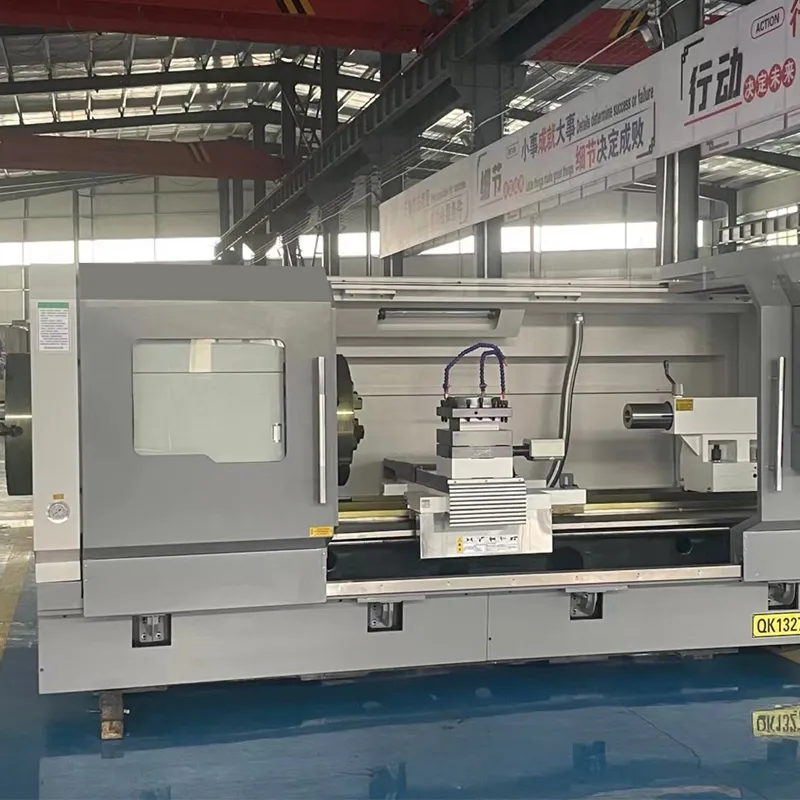
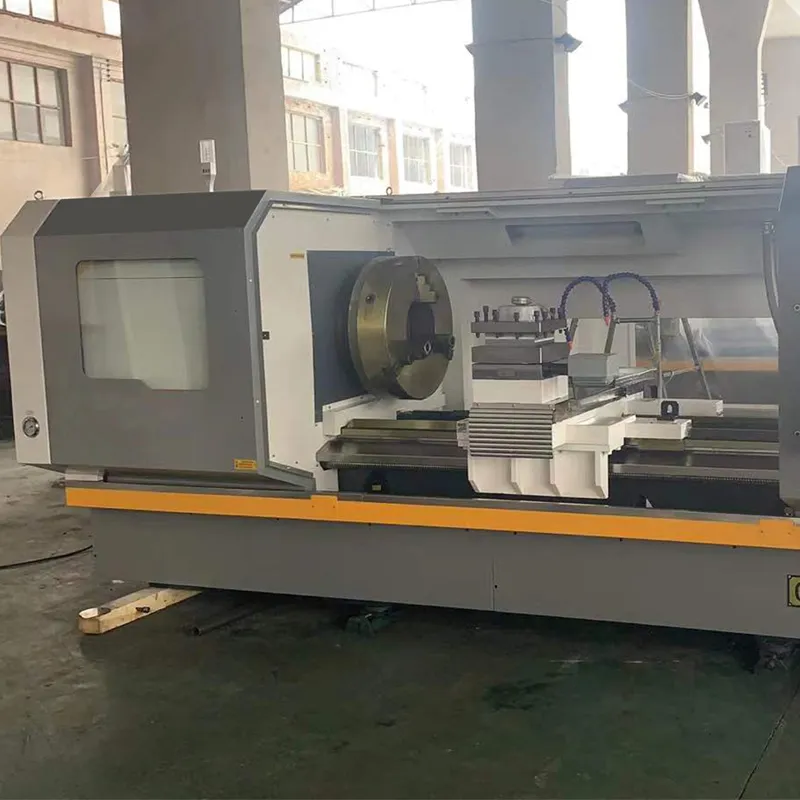
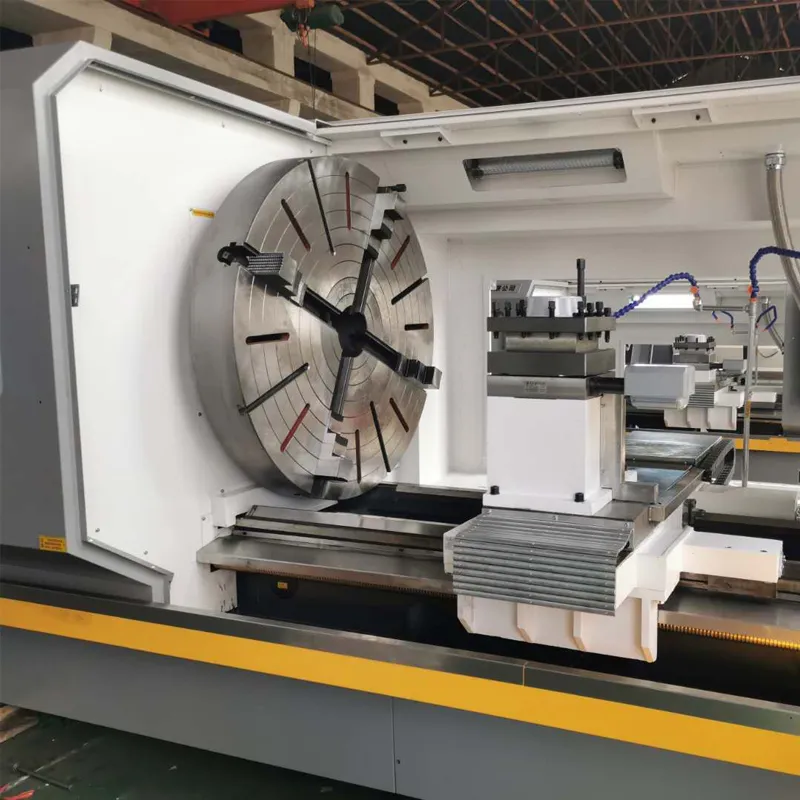
The overall gearbox spindle unit adopts a high-power spindle motor with stepless speed regulation within the gear range, with a wide adjustment range, which can meet the requirements of thread precision machining and achieve efficient cutting. The application of quenched precision grinding gears and high-quality bearings ensures low machine noise and good sound quality. The spindle box adopts an external circulation lubrication and cooling system, which not only reduces the temperature rise of the spindle, but also effectively ensures the cleanliness and lubrication of the spindle box. X. High precision ball screws are used for the Z-axis, and YT soft belts are attached to the track of the large drag plate to improve the guiding accuracy and machine tool accuracy retention, effectively extending the service life of the machine tool. This machine tool is suitable for batch processing of castings and steel parts, as well as for rough and semi precision processing.
|
Serial Number |
Equipment name |
Model or specification |
Describe |
Number |
| 1 | CNC lathe | QK1319*1500*600 | One clamp and one top load-bearing 2.5T | 1 unit |
| (Floor-standing bed) | Guide rail width (600MM) | |||
| 2 | system | Guangshu 980TDI | 1 set | |
| Beijing KND2000 | ||||
| 3 | ball screw | Z 6310*2410 | Han River P4 | 1 set |
| X 4006*875 | Han River P3 | |||
| 4 | Servo motor | X motor 1.85KW13015N | Guangshu/KND | 2 unit |
| Z motor 2.3KW13015N | ||||
| 5 | Electric knife table | LDB4 280*280 | Hongda/Xinshu | 1 set |
| 6 | Main motor | 15KW | Xingtai Motor | |
| 7 | Screw feed bearing | 7602040P4 | Harbin | |
| 7602025P4 | ||||
| 8 | Spindle box gear | Level 6 advanced gear grinding | Shenyang First Machine Tool Factory | |
| 9 | Frequency converter | 15KW | Hailing | |
| 10 | Spindle | High precision spindle | Surabaya Fonda | |
| 11 | Spindle bearings | NN3052KP5 | Pegasus | |
| 7048ACP5 | ||||
| 12 | chuck | 500 manual three claw | Domestic famous |
Random Attachments And Tools
|
Serial Number |
Name |
Drawing number or model |
specifications |
number |
notes |
| 1 | Chuck wrench | 1 | indivual | ||
| 2 | Tool table wrench | 1 | indivual | ||
| 3 | Tailstock wrench | 1 | indivual | ||
| 4 | Follow the knife rest | custom made | |||
| 5 | center frame | custom made | Over 3 meters including 1 | indivual | |
| 6 | cooling device | random | 1 | set | |
| 7 | Adjustable screw | random | 1 | set | |
| 8 | 24V lighting | random | 1 | set |
2.1 Overview of the Purpose, Performance and Characteristics of Lathes
The QK1319 horizontal lathe can undertake various turning tasks, including turning the outer circle, inner hole, and end face of various parts; The upper tool holder can be used for turning short taper angles (cone generatrix length L ≤ 300 mm) when operated independently, and can be used for turning long taper angles when combined with longitudinal feed; In addition, it can also meet the process requirements of drilling, boring, and nesting, and is also suitable for strong turning of hard alloy cutting tools to process various black and non-ferrous metals.
This machine tool also has inherent characteristics such as high power, high speed, low noise, strong rigidity, high precision, and good precision retention. It also has external characteristics such as beautiful and elegant appearance, compact and reasonable layout. It also has advantages such as centralized handle, intuitive label image, flexible and convenient operation, safety and reliability, and good comfort.
2.2 Main Technical Parameters Of The Machine Tool:
| 2.1 Maximum rotation diameter of the bed | 860mm |
| 2.2 Servo motor | 15nm,15nm |
| 2.3 Maximum rotation diameter of tool holder | 540mm |
| 2.4 X middle carriage width | 330mm |
| 2.5 Width of guide rails on the upper part of the bed | 600mm |
| 2.6 Spindle through hole diameter | 196mm |
| 2.7 Spindle speed | 25-84/108-382 |
| 2.8 Spindle | Manual two gears |
| 2.9 Distance between front and rear chucks | 1500mm |
| 2.10 Minimum moving unit of carriage in Z direction | 0.001mm/min |
| 2.11 Minimum movement unit of dragging plate in X direction | 0.0005mm/min |
| 2.12 Z-direction stroke of carriage | 1500mm |
| 2.13 Pallet X-direction travel | 470mm |
| 2.14 X-phase positioning accuracy | 0.015mm/100mm |
| 2.15 Z phase positioning accuracy | 0.02mm/100mm |
| 2.16 X-phase repeat positioning accuracy | 0.01mm/100mm |
| 2.17 Z-phase repeat positioning accuracy | 0.01mm/100mm |
| 2.18 Maximum processing length | 1350mm |
| 2.19 X/Z rapid movement speed of carriage | 6000mm/min |
| 2.20 tailstock sleeve diameter | 130mm |
| 2.21 Tailstock sleeve tapered hole | Mohs No. 6 |
| 2.22 Maximum stroke of tailstock sleeve | 250 mm |
| 2.23 Main motor power | 15KW |
| 2.24 Repeatable positioning accuracy of electric tool holder | 0.002mm |
| 2.25 Overall machine weight | 5.5T |
| 2.26 Appearance size (mm) | Height 2200*Width 2200*Length 4200 |
3.1 Bed frame
The bed adopts an integral structure, resin sand molding, and the guide rail adopts high-frequency quenching and grinding technology, which makes the machine tool have good wear resistance and precision retention. The bed width is 600mm, and the π - shaped reinforcement ribs give the bed excellent rigidity, vibration resistance, and resistance to cross-sectional distortion. The 45 ° inclined rear chip removal method is convenient for chip removal. In order to improve the overall seismic resistance of the bed, a sand sealing structure is adopted. The bed has undergone advanced finite element mechanics analysis, which theoretically confirms the rationality of the structure, excellent rigidity, seismic resistance, and resistance to section distortion.
3.2 Spindle Box
The spindle adopts a three-point support form, with front and rear support as the main support and middle support as the auxiliary. Reasonable bearing configuration and span design, coupled with high-precision spindle bearings, enable the machine tool to have good rotational accuracy and high spindle rigidity and load-bearing capacity. The optimized transmission system and gears processed by high-frequency quenching and grinding technology make the spindle box have the characteristics of low noise, high transmission accuracy, and large output torque. The spindle brake is a sensitive and reliable brake that comes with the motor.
3.3 Tail Seat
The tailstock consists of an upper and lower body. The upper body is equipped with a sleeve and a sleeve fast/slow moving mechanism. The taper hole of the tailstock sleeve of the machine tool is metric No. 6. If a taper sleeve is installed, a Mohs No. 5 tip can be used. The tailstock of this machine tool has the characteristics of high precision, strong load-bearing capacity, long maintenance cycle, and reliable operation.
3.4 Trailer and knife holder
The main function of this section is to complete various feeding tasks. In order to effectively prevent longitudinal crawling of the large trailer feed, the trailer guide rail pair adopts the method of pasting high-performance plastic soft tape; Thoroughly eliminated the problem of longitudinal and transverse feed linkage in the longitudinal and transverse branch structure, and improved the reliability of the machine tool.
3.5 Cooling System
There is a dedicated cooling box located below the ground level of the machine tool foundation. After the cooling liquid is pumped out by the cooling pump, it is sprayed into the effective cutting area through the water supply pipe to effectively improve the cutting conditions. The coolant can be recovered into the cooling box through the bottom chip groove of the bed, without causing pollution to the environment.
3.6 Hydraulic System
Divided into two parts, one is the lubrication of the guide rail and screw, using an intermittent electronic oil pump to achieve intermittent oil supply, and the time can be adjusted as needed. II The spindle box is lubricated using a cycloidal oil pump. After the machine is powered on, the oil pump automatically runs and flows into the spindle box after being pumped out, lubricating the spindle gears and bearings, and finally returning to the lubrication oil tank to complete the cycle.
3.7 Electrical System
The electrical system mainly realizes the control of strong and weak electricity, effectively integrating the mechanical and electrical systems, and making it easy to control and operate the machine tool.
4.1 QK1319 Horizontal Lathe Execution Standard, its main items are as follows:
The roundness of the outer circle of the precision car is 0.015mm/100mm
The cylindricity of the outer circle of the precision car is 0.01 mm/100 mm
The flatness of the precision machined end face is 0.01mm/100mm
The pitch accuracy of the precision car pitch is 60 mm, with a length of 0.015 mm
Dimensional accuracy IT 7
5.1 Roundness of precision car outer circle 0.015mm/100mm
5.2 The cylindricity of the outer circle of the precision car is 0.01 mm/100 mm
5.3 Flatness of precision machined end face 0.01 mm/100 mm
5.4 Pitch accuracy of precision turning: 0.015 mm on a length of 60 mm
5.5 Dimensional Accuracy IT 7
5.6 Bed hardness greater than HRC52
7.1 Quality Assurance
7.1.1 The product warranty period is within 12 months from the date of equipment delivery.
7.1.2 During the warranty period, if any quality problems occur with the equipment, Party B shall be responsible for free repair or replacement of damaged parts until the equipment reaches normal use;
7.2 Service Commitment
a. Free service will be implemented within one year, with warranty for repair and replacement, except for liability accidents. In accordance with the principle of friendly cooperation, paid technical and spare parts services will be implemented one year later.
b. Timely provision of spare parts to ensure long-term supply of maintenance components.
c. If quality problems are found during the user's use of the product, a response or service personnel will be dispatched within 48 hours after receiving notification from the user, and the fault will not be eliminated and the maintenance personnel will not leave the site.
8.1 Any matters not covered in this agreement shall be resolved through consultation between Party A and Party B.
8.2 This agreement, as an attachment to the contract, has the same legal effect as the contract.
8.3 This agreement is made in quadruplicate, with each party holding one copy, the Material Procurement Management Department holding one copy, and the other copy kept for future reference. Both parties shall sign and stamp the agreement


